After your DVD movie is loaded, you can start to set output settings:
1. Select an encoder type from the format drop-down list according to the device you want to put the video on.
2. Click the "Settings" button to set the video and audio parameters.
3. Name each title/chapter in the "Output Filename"field, and select the suitable subtitle and audio track for the titles/chapters if you want. ]You can check the "Merger into one file" option to join all the selected DVD titles/chapters into one file instead of creating a separated file for each title/chapter.
Step 3: Click the "Start" button to start the conversion.
All you need to do now is to wait for the conversion to be finished. The remaining time will be shown on conversion window for your reference.
Some Tips:
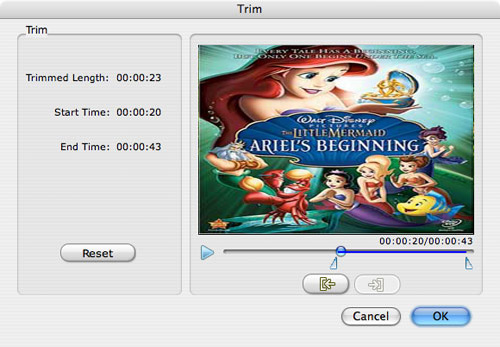
1. Trim Movie
If you just want to convert a clip from your DVD movie, you can click the Trim icon to capture a clip. In the Trim window, you can trim the length of the current title/chapter by either dragging the Start Time and End Time sliders or setting the time parameters in each corresponding field.
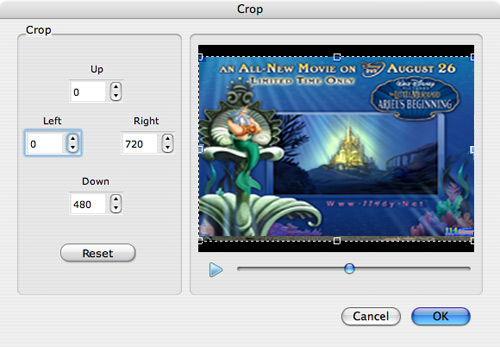
2. Crop Video
If your DVD video has black sides, you can use this Crop function to remove them. Click the Crop icon to open the Crop window, and set the video crop area by dragging the crop frame or setting the four crop parameters (Top, Bottom, Left and Right).
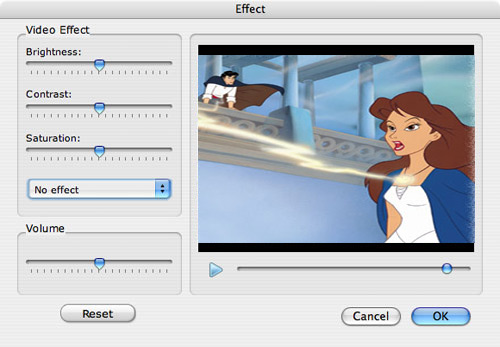
3. Movie Effect
If you want to change the original video effect, you can click the Effect icon to set the video brightness, contrast, saturation, and even audio volume. You can also choose to apply a special effect to your movie video from the available effects including Gray, Emboss and Negative.
Part 2: How to convert Videos on Mac OS X to put on portable devics
Step 0: Download and install Aiseesoft Video Converter for mac(Intel Version) or (Power PC Version)
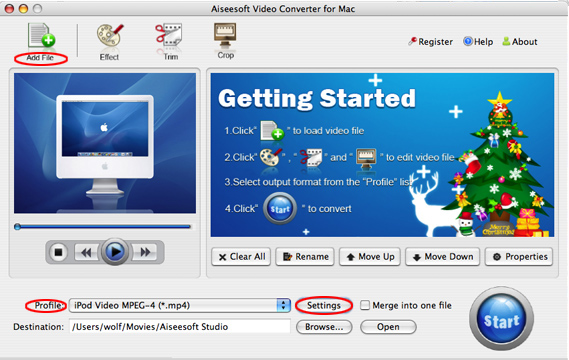
Step 2: Click "Add File" to load your video sources.
The supported input formats includes: MPG, MPEG, MPEG2, VOB, MP4, M4V, RM, RMVB, WMV, ASF, TS, MKV, AVI, 3GP, FLV, MPV, MOD, TOD, MP3, MP2, AAC, AC3, WAV, MID, MIDI, WMA, M4A, RA, RAM.
Step 3: Set the output formats, specific parameters and destination by click the drop-down arrow of “Profile” to choose the exact output format
Step 4: Click "Start" button to begin the conversion. The conversion speed can reach up to 300%, in a short while the conversion will be finished.
More editing functions:
1. Effect:
Click "Effect" button to open the effect window.
It allows you to edit your movie’s effect including "Brightness, Contrast, Hue, Saturation and Volume".
2. Trim:
Click "Trim" to open the trim window.
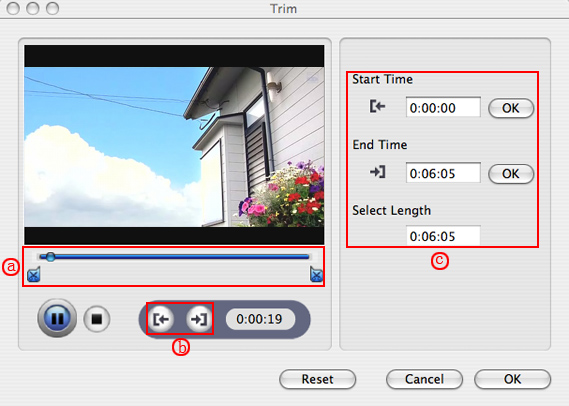
There are three ways to trim the convertered video, just as the label a, b, c showing in the picture.
3.Crop:
Click "Crop" to open the crop window.
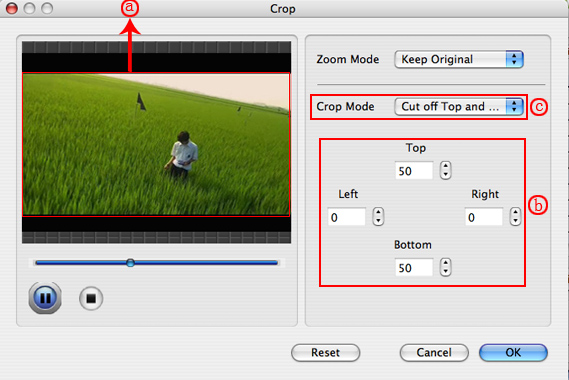
There are three ways to set the crop mode, just as the label a, b, c showing in the picture. There is also Zoom Mode to fit for your player screen.
4.Merge into one file
Pick the files that your want to join, Pick "Merge into one file". After conversion, these separated files are be joined into one file.
Now you can easily enjoy your DVDs and Video on your portable devices, so what are you waiting for? Just try this and have a colorful digital experience!
Mac Video Converter